
Most MacBook users love the idea of editing videos with Final Cut Pro or Adobe Premiere Pro, but many face slowdowns, crashes, or laggy previews. If you’ve ever tried cutting together a project only to watch your Mac struggle, you know how frustrating it can be. Video editing is demanding: it needs fast storage, lots of RAM, powerful graphics, and a well-tuned system. The good news is you can transform your MacBook into a smooth, reliable editing machine with the right approach. Whether you’re a creative professional or just starting, this guide gives you practical, proven steps to get the best out of your MacBook.
Understanding Macbook Requirements For Video Editing
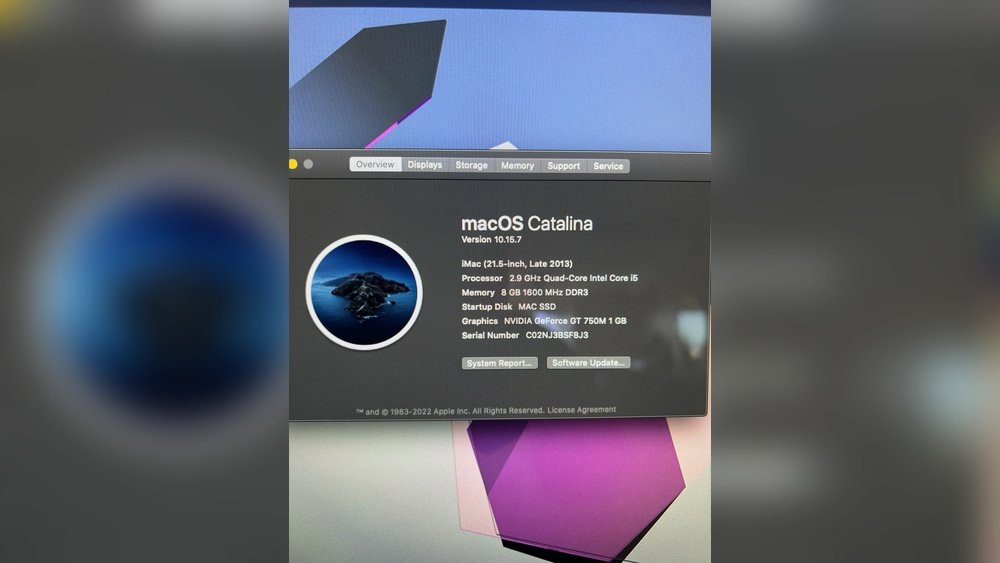
Before you optimise, it’s important to know what matters most in a MacBook for video work. Many beginners focus only on the processor, but RAM, storage speed, and GPU are just as crucial. Even with the latest processor, a shortage of memory or slow storage can bring editing to a crawl.
Minimum And Recommended Specs
Here’s a comparison of minimum and recommended specs for Final Cut Pro and Premiere Pro editing:
Component | Minimum Spec | Recommended Spec |
|---|---|---|
Processor | Intel Core i5/M1 | Apple M2/M3 or Intel i7/i9 |
RAM | 8GB | 16GB or higher |
Storage | 256GB SSD | 1TB SSD (NVMe) |
GPU | Integrated | Dedicated/Apple Silicon |
Display | Retina, HD | Retina, 4K |
Why Specs Matter
RAM lets your MacBook hold more video data and effects at once, which is crucial when working with multiple video layers or high-resolution timelines. Insufficient RAM means your Mac must keep swapping data, slowing everything down. Many new editors overlook RAM and focus only on CPU, but memory shortages cause more real-world problems.
Fast SSDs speed up loading, saving, and rendering. A slow drive can bottleneck your entire workflow, especially when editing 4K or RAW footage. For example, reading files from a standard hard disk might take several times longer than from an NVMe SSD, leading to delays every time you preview or render.
Newer Apple Silicon chips (M1, M2, M3) have built-in graphics that handle video tasks smoothly. These chips are designed for creative work and make a visible difference in export times and real-time playback, especially compared to older Intel models. If your MacBook is older, it may need extra optimisation to keep up.
Non-obvious Insight: Storage speed can affect not just file transfers, but also timeline scrubbing and effects previews. Many users think only about storage size and ignore speed, but a slow drive can make editing nearly impossible, even if you have enough space.
Long-tail Keywords Integrated
Best MacBook for video editing
Final Cut Pro performance tips
Adobe Premiere Mac optimisation
Video editing MacBook settings
MacOS tweaks for video editing
Preparing Your Macbook: Essential Steps
Before opening your editing software, your MacBook needs a clean slate. This section covers what to do before you start editing.
Clean Up Storage
Large video files fill up your disk quickly. If your SSD is almost full, your MacBook will slow down. MacBooks need at least 10–20% free space to work well, as the system uses this space as “virtual memory” when RAM is full.
Delete old projects, caches, and unused apps. Don’t forget to empty the Trash after deleting files.
Use macOS’s “Manage Storage” tool in System Settings. This tool shows large files, old documents, and apps that haven’t been used for a long time.
Move raw footage and finished projects to external drives. This frees up your internal SSD for system and app performance.
Example: A 30-minute 4K project with multiple camera angles can use 100GB or more. Storing such files on your Mac’s main drive can quickly fill it up, so moving them to external SSDs is a smart habit.
Disable Unnecessary Background Apps
Apps running in the background can take up valuable RAM and CPU. Check your Activity Monitor for resource-heavy processes, then quit them. Common offenders include web browsers with many tabs, music streaming apps, and cloud sync tools. Even small background apps (like chat tools or weather widgets) add up.
Tip: Some apps set to launch at startup can drain resources every time you turn on your MacBook. Check System Settings > Users & Groups > Login Items and remove anything unnecessary.
Update Macos And Editing Software
Always run the latest version of macOS and your editing apps. Updates fix bugs and improve compatibility, especially with new codecs and hardware. Editing software developers often release performance improvements and new features, so staying updated avoids many common issues.
Non-obvious Insight: Delaying updates for too long can cause plugin conflicts and project compatibility problems. Some users skip updates to “avoid bugs,” but this often leads to even more trouble with modern video formats.
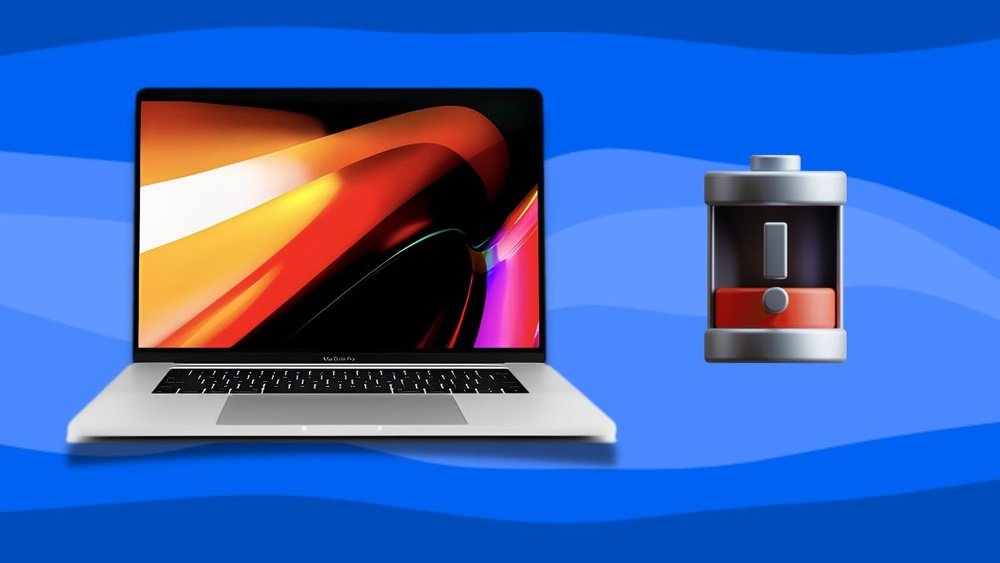
Optimise Power Settings
Switch your MacBook to “Best Performance” mode (found in battery settings) when plugged in. This keeps the CPU and GPU running at full speed. Disabling “Battery Saver” or “Low Power Mode” ensures your MacBook doesn’t throttle performance while editing.
Extra Tip: If you edit on battery, expect lower performance. For important projects, always plug in your MacBook to guarantee consistent speed.
Upgrading Hardware: When And How
Sometimes, software tweaks aren’t enough. If you edit video often, upgrading your hardware can make a big difference. But knowing what to upgrade—and when—is essential.
Ram And Storage Upgrades
Most recent MacBooks have soldered RAM, so upgrading isn’t possible after purchase. Choose at least 16GB RAM when buying. If you work with multicam projects, 32GB or more is best. For storage, use external SSDs with USB-C or Thunderbolt for fast transfers.
Practical Example: If you regularly work with multi-layer effects or 6K/8K footage, 32GB RAM can help avoid slowdowns and crashes. For most users, 16GB is enough for 4K editing, but more RAM is always safer for future needs.
External GPU (eGPU)
If you own an Intel-based MacBook, an eGPU can boost rendering and preview speeds. Apple Silicon models (M1/M2/M3) have powerful built-in graphics, so eGPU isn’t necessary. For older Intel models struggling with effects-heavy timelines, an eGPU can extend their useful life.
External Monitors
A larger display helps with timeline management and colour grading. Choose a calibrated 4K monitor for accurate previews. Some editors use a dual-monitor setup: one for the timeline, one for full-screen playback. This speeds up detailed work and helps spot errors.
Upgrade | Benefit | Best For |
|---|---|---|
External SSD | Faster file access | All MacBooks |
eGPU | Better graphics | Intel MacBooks |
Extra RAM | Smoother multitasking | Older MacBooks |
4K Monitor | Improved visuals | Colour grading |
Non-obvious Insight: Many editors forget the importance of good cables. Using the wrong USB cable can limit SSD speed to a fraction of its potential. Always use cables rated for USB 3.1 Gen 2 or Thunderbolt 3/4 for best results.
Configuring Final Cut Pro And Premiere Pro For Maximum Performance
Your editing app’s settings have a big impact on speed and stability. Many users overlook these, but they can be the difference between smooth editing and endless frustration. Fine-tuning these options can unlock performance even on older hardware.
Final Cut Pro Settings
Final Cut Pro is optimised for Apple Silicon, but you can still improve performance:
Create Proxies: Proxies are low-resolution copies of your footage. Editing with proxies makes playback and scrubbing much faster, especially with 4K or RAW video. After editing, you can easily switch back to full quality for export.
Enable Background Rendering: Set rendering to happen automatically, so you don’t need to wait at the end. Check preferences for “Background Render.” Adjust the render time interval to suit your workflow; shorter intervals mean less waiting after edits.
Optimise Media: Convert footage to Apple ProRes for smoother editing. Final Cut Pro works best with ProRes files, reducing lag during playback and effects.
Manage Libraries: Store libraries on fast SSDs, not the internal drive, if possible. This avoids competing with the system for disk speed.
Practical Example: If your timeline starts lagging after adding effects, converting your clips to ProRes and creating proxies can often fix the problem instantly.
Premiere Pro Settings
Adobe Premiere Pro is more cross-platform, but needs careful setup on MacBooks:
Set Optimised Playback Resolution: Lower the playback quality to 1/2 or 1/4 when previewing complex timelines. This lets you see edits in real time without overloading your system.
Enable GPU Acceleration: In “Preferences” under “Renderer,” choose “Metal” or “CUDA” for faster effects and rendering. GPU acceleration is essential for modern effects and colour grading.
Use Smart Rendering: Render previews for heavy effects before exporting. This avoids export errors and speeds up final renders.
Organise Media Cache: Move cache folders to fast external SSDs to avoid bottlenecks. Clearing the cache regularly can also prevent random slowdowns or crashes.
Non-obvious Insight: Both Final Cut and Premiere allow you to choose which drive to use for cache and preview files. Placing these on a separate SSD from your footage can make a surprising difference in performance.

Credit: me.pcmag.com
Managing Storage For Large Video Projects
Video projects can easily reach hundreds of gigabytes. Good storage habits prevent slowdowns and data loss.
Choosing The Right External Drive
External drives should be SSD (not HDD), with USB-C or Thunderbolt. Aim for at least 500MB/s read/write speed. Brands like Samsung, SanDisk, and Crucial are reliable. HDDs are too slow for video editing and can cause dropped frames or long load times.
Practical Tip: Some editors use two SSDs—one for active projects, one for backups. This helps keep work organised and safe.
Organising Files And Projects
Create folders for each project. Separate raw footage, edited sequences, and exports. Use clear naming to avoid confusion. For example, “ProjectName_RawFootage,” “ProjectName_Sequences,” and “ProjectName_FinalExports.” This makes it easy to find files, even months later.
Non-obvious Insight: Keeping your export folder on a different drive from your footage can sometimes improve export speed, especially on older MacBooks.
Backups And Redundancy
Always back up your projects to another drive or cloud storage. Losing a project due to a drive failure is a common mistake for new editors. Use automated backup solutions like Time Machine or cloud services such as Google Drive or Dropbox for off-site safety.
Extra Tip: Back up both your project files and the media cache folder. If you only save project files, a missing cache can cause playback errors when re-opening.
Improving System Performance: macOS Tweaks
Small changes in macOS settings can make editing smoother.
Turn Off Visual Effects
Disable transparency and motion in System Preferences > Accessibility. This frees up GPU resources. These effects look nice, but they can slow down your MacBook, especially on older models.
Non-obvious Insight: Disabling these settings also reduces battery drain during long editing sessions.
Customise Finder Preferences
Set Finder to show only essential folders and disable preview thumbnails for video files. This speeds up browsing and reduces accidental slowdowns when opening folders full of large video files.
Disable Automatic Updates
Turn off automatic updates while editing. Updates can run in the background and slow everything down. Remember to manually check for updates after finishing major projects.
Extra Tip: Pause cloud sync tools like iCloud Drive or Dropbox during important edits. They can use bandwidth and CPU, causing unexpected lag.
Workflow Optimisation: Editing Smarter
An efficient workflow is as important as hardware. The way you organise your editing process impacts speed and creativity.
Use Keyboard Shortcuts
Both Final Cut Pro and Premiere Pro offer customisable shortcuts. Learning them saves time on repetitive tasks. For example, setting custom shortcuts for cut, ripple delete, or timeline zoom can make editing feel much faster.
Practical Example: Professional editors often use an external keyboard with colour-coded shortcut stickers for even more speed.
Pre-edit Planning
Plan your project structure before importing clips. Group footage by scene or camera angle to make the timeline easier to manage. A bit of planning saves hours later.
Batch Processing
Apply effects, colour correction, or audio tweaks to multiple clips at once. This reduces manual work and keeps your edits consistent.
Preview Settings
Set preview windows to lower quality unless checking the final output. This keeps playback smooth and reduces strain on your MacBook.
Non-obvious Insight: If you regularly use the same effects or titles, save them as presets or templates. This speeds up future projects and ensures consistency.
Troubleshooting Common Issues
Even a well-optimised MacBook can run into problems. Here’s how to fix the most frequent issues:
Slow Playback
Check if you’re editing high-resolution files without proxies. Switch to proxy mode or reduce playback resolution. Also, make sure your external drive isn’t nearly full or overheating, as this can slow transfers.
Crashes And Freezes
Update your editing software. If crashes persist, delete caches, restart your MacBook, and check for macOS updates. Sometimes, corrupted plugins or effects can cause instability—try disabling them one by one.
Export Failures
Make sure you have enough free storage. Export to an external SSD if internal space is low. Also, check export settings for incompatible formats or mismatched frame rates.
Audio Sync Problems
Convert audio files to standard formats (like WAV) before importing. Out-of-sync audio is often due to mismatched sample rates or variable frame rate footage. If you face sync issues, transcode your video to a constant frame rate before editing.

Credit: www.youtube.com
Advanced Optimisation: For Professional Editors
If you work with complex projects or want to push your MacBook to its limits, these tips can help.
Use Raid Arrays
Professional editors often use RAID 0 or RAID 5 SSD arrays for even faster storage and redundancy. This is useful for studios with multiple editors. RAID 0 stripes data across drives for speed; RAID 5 adds redundancy for safety.
Network Storage (NAS)
For teams, a NAS lets multiple people access footage and projects at the same time. Choose a NAS with 10GbE connectivity for high-speed transfers. Some NAS units also support automatic backups and remote access.
Colour Calibration Tools
Use hardware calibrators like X-Rite i1Display Pro for accurate colour grading. MacBooks are good, but monitors need calibration for pro work. This is essential for broadcast or commercial projects where colour accuracy is critical.
Benchmarking Your System
Test your MacBook’s editing performance with tools like Blackmagic Disk Speed Test or Geekbench. Compare scores before and after optimisation. This helps identify bottlenecks and track improvements over time.
Extra Tip: If you regularly collaborate with others, use shared project tools like Frame.io or Adobe Team Projects for real-time feedback and smoother teamwork.
Real-world Examples: How Editors Optimise Their MacBooks
Case Study 1: Freelance Editor Upgrades
Emma, a freelance editor, upgraded from an Intel MacBook Pro to a MacBook Pro M2 with 32GB RAM. She moved her libraries to a Samsung T7 SSD and switched to proxy editing in Final Cut Pro. Render times dropped by 60%, and timeline scrubbing became instant. Emma also noticed fewer crashes and could handle larger projects without freezing.
Case Study 2: Small Production Team
A video team uses a Mac Studio with a NAS for shared storage. Each editor connects via Thunderbolt and uses Premiere Pro’s team projects. They calibrate monitors monthly and store caches on separate SSDs. This setup lets them edit 6K footage with zero lag.
Their workflow also includes daily backups and task lists, reducing mistakes and lost files.
Non-obvious Insight: Both Emma and the team found that regular hardware cleaning (dusting ports, checking cables) prevented connection issues and drive failures, a detail often missed by busy editors.
Credit: www.editorskeys.com
Data: Macbook Models Compared For Video Editing
To help you choose the right MacBook, here’s a comparison of current models:
Model | CPU/GPU | RAM | Storage | Editing Performance |
|---|---|---|---|---|
MacBook Air M2 | M2 (Integrated) | 8-24GB | 256GB-2TB | Good for HD/4K |
MacBook Pro 14″ M2 Pro | M2 Pro (12-core) | 16-32GB | 512GB-4TB | Excellent for 4K/RAW |
MacBook Pro 16″ M3 Max | M3 Max (16-core) | 32-128GB | 1TB-8TB | Ideal for 8K/Studio |
MacBook Pro (Intel) | i7/i9 (Dedicated) | 16-64GB | 512GB-2TB | Fair, needs eGPU |
Insight: Many beginners assume the Air is too weak, but it handles basic 4K edits well. However, for heavy effects or multi-camera work, Pro models are best. The M3 Max is overkill for most users, but it future-proofs your setup for years.
Common Mistakes When Optimising For Video Editing
Mistakes can waste time and money. Avoid these when setting up your MacBook:
Buying too little RAM or storage. Always plan for future project sizes, not just current needs.
Using slow external drives (like old HDDs). SSDs are far faster. A slow drive can make even the best MacBook feel sluggish.
Ignoring software updates. Outdated apps can cause crashes and lose support for new video formats.
Not backing up projects. Always have at least one backup—ideally on a separate physical device.
Editing directly from SD cards. Transfer footage to SSDs first. SD cards are not fast or reliable enough for heavy editing.
Non-obvious Insight: Forgetting to clean up old cache files and render previews can eat up hundreds of GB, causing sudden storage shortages. Set a reminder to clean up caches monthly.
Low-competition Keywords To Target
Best MacBook settings for Final Cut Pro
Optimise MacBook SSD for video editing
Adobe Premiere Pro MacBook lag fix
MacBook Pro proxy workflow tips
How to speed up video rendering on a MacBook
Internal Linking Ideas
Link to a guide on macOS security tips for creatives.
Link to a tutorial about external SSD setup on a MacBook.
Link to a post comparing MacBook Air vs Pro for creative work.
Frequently Asked Questions
How Much RAM Do I Need For Video Editing On A Macbook?
For most projects, 16GB RAM is the minimum. If you edit long videos, work with 4K/8K footage, or use many effects, 32GB RAM (or higher) is ideal. Apple Silicon models use RAM more efficiently than Intel, but more RAM always helps.
Can I Upgrade My MacBook’s RAM or Storage After Purchase?
Most modern MacBooks (since 2016) have soldered RAM and storage. You cannot upgrade them later. Choose the highest specs you can afford when buying. For storage, use external SSDs for expansion.
What’s The Best Macbook Model For Video Editing?
For basic editing, the MacBook Air M2 is good. For pro work, the MacBook Pro 14″ or 16″ (M2 Pro or M3 Max) is best. If you want maximum speed and flexibility, choose a Pro model with at least 32GB RAM and 1TB SSD.
How Do I Prevent Crashes During Editing?
Keep your editing software and macOS updated. Clear caches regularly, use proxies, and avoid running other heavy apps. If problems persist, restart your MacBook and check your disk space.
Is An External Gpu Necessary For Macbook Video Editing?
Apple Silicon MacBooks (M1, M2, M3) have powerful integrated graphics. You don’t need an eGPU. For older Intel MacBooks, an eGPU can help with rendering and playback.
Final Thoughts
Optimising your MacBook for video editing with Final Cut Pro or Adobe Premiere Pro is not just about buying the latest hardware. Smart setup, good storage habits, and careful software configuration make a huge difference. Whether you’re cutting together your first YouTube video or handling broadcast projects, the steps above will help you achieve smooth playback, fast rendering, and reliable results.
Remember, keep your system clean, plan your workflow, and back up your work. Over time, these practices lead to faster edits and less stress.
For more in-depth technical details, the official Apple support pages are helpful: Apple Support. By applying these tips, your MacBook becomes a powerful, efficient editing tool—ready for anything your creative journey brings.